> ## Documentation Index
> Fetch the complete documentation index at: https://docs.getlark.ai/llms.txt
> Use this file to discover all available pages before exploring further.
# Quickstart
> Create and run your first workflow in minutes from the dashboard or CLI.
Prefer to run Lark from an AI coding agent? See [MCP](/mcp-quickstart) for Claude Code, Cursor, and other agent integrations.
## Create your first workflow
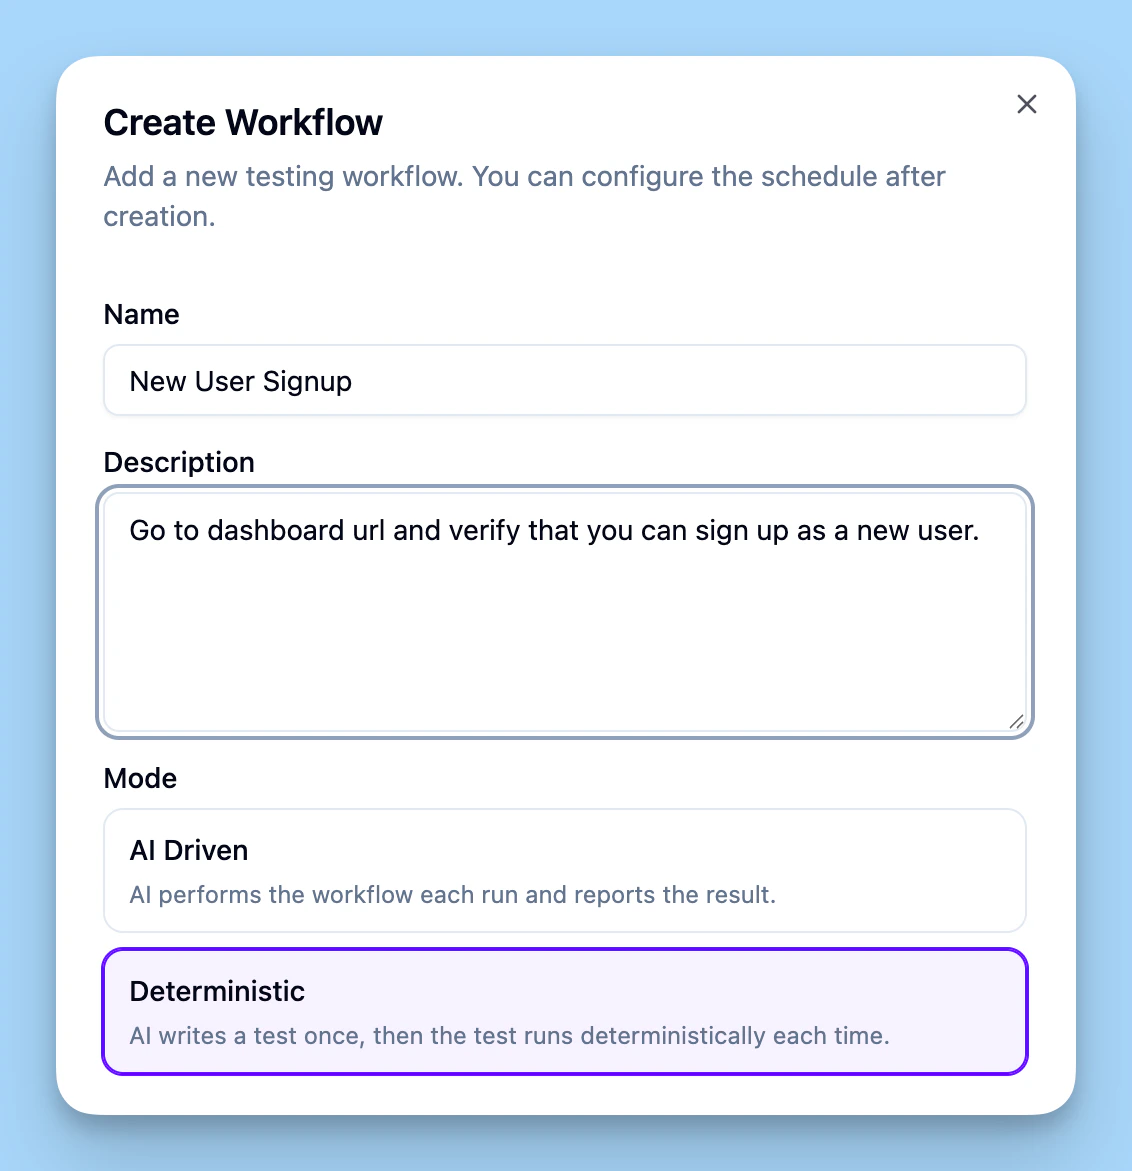 In the [dashboard](https://dashboard.getlark.ai/workflows), go to **Workflows**. Click **Create workflow** to add a new one.
Write your test in plain English. For example, "Log in and verify the dashboard loads" or "Call the API and check the response." No code required.
* **Deterministic (i.e. scripted)** - The AI writes a script that runs the same steps every time. Lark keeps the test updated as your product changes (e.g. UI updates).
* **AI-driven** - The AI performs the test from scratch each run, deciding how to achieve the goal. Best for complex flows like "follow the integration quickstart and verify it works."
If the test needs credentials (API keys, login credentials, etc.), attach a [secret context](/testing/secrets). Otherwise you can skip this.
Hit **Run**. The workflow runs in a sandbox environment. When it finishes, you'll see the result and any artifacts (screenshots, videos, logs).
Make sure you have Node.js 18+ and your API key set:
```bash theme={null}
export GETLARK_API_KEY=your-api-key
```
```bash theme={null}
npx -y @getlark/cli workflows create \
--name "New User Signup" \
--description "Go to dashboard url and verify that you can sign up as a new user." \
--mode deterministic
```
Pick a name, describe what to test in plain English, and choose a mode:
* **Deterministic** — The AI writes a script that runs the same steps every time. Lark keeps the test updated as your product changes (e.g. UI updates).
* **AI-driven** (default) — The AI performs the test from scratch each run, deciding how to achieve the goal. Best for complex flows.
See the [CLI reference](/testing/cli) for all options.
If the test needs credentials, create a [secret context](/testing/secrets) in the dashboard and attach it with `--secret-contexts`:
```bash theme={null}
npx -y @getlark/cli workflows create \
--name "User Login" \
--description "Go to the dashboard and verify you can login to the dashboard." \
--mode deterministic \
--secret-contexts dashboard_login
```
```bash theme={null}
npx -y @getlark/cli workflows invoke --all --wait
```
The `--wait` flag blocks until the run finishes. When it completes you'll see the result in your terminal.
## View results
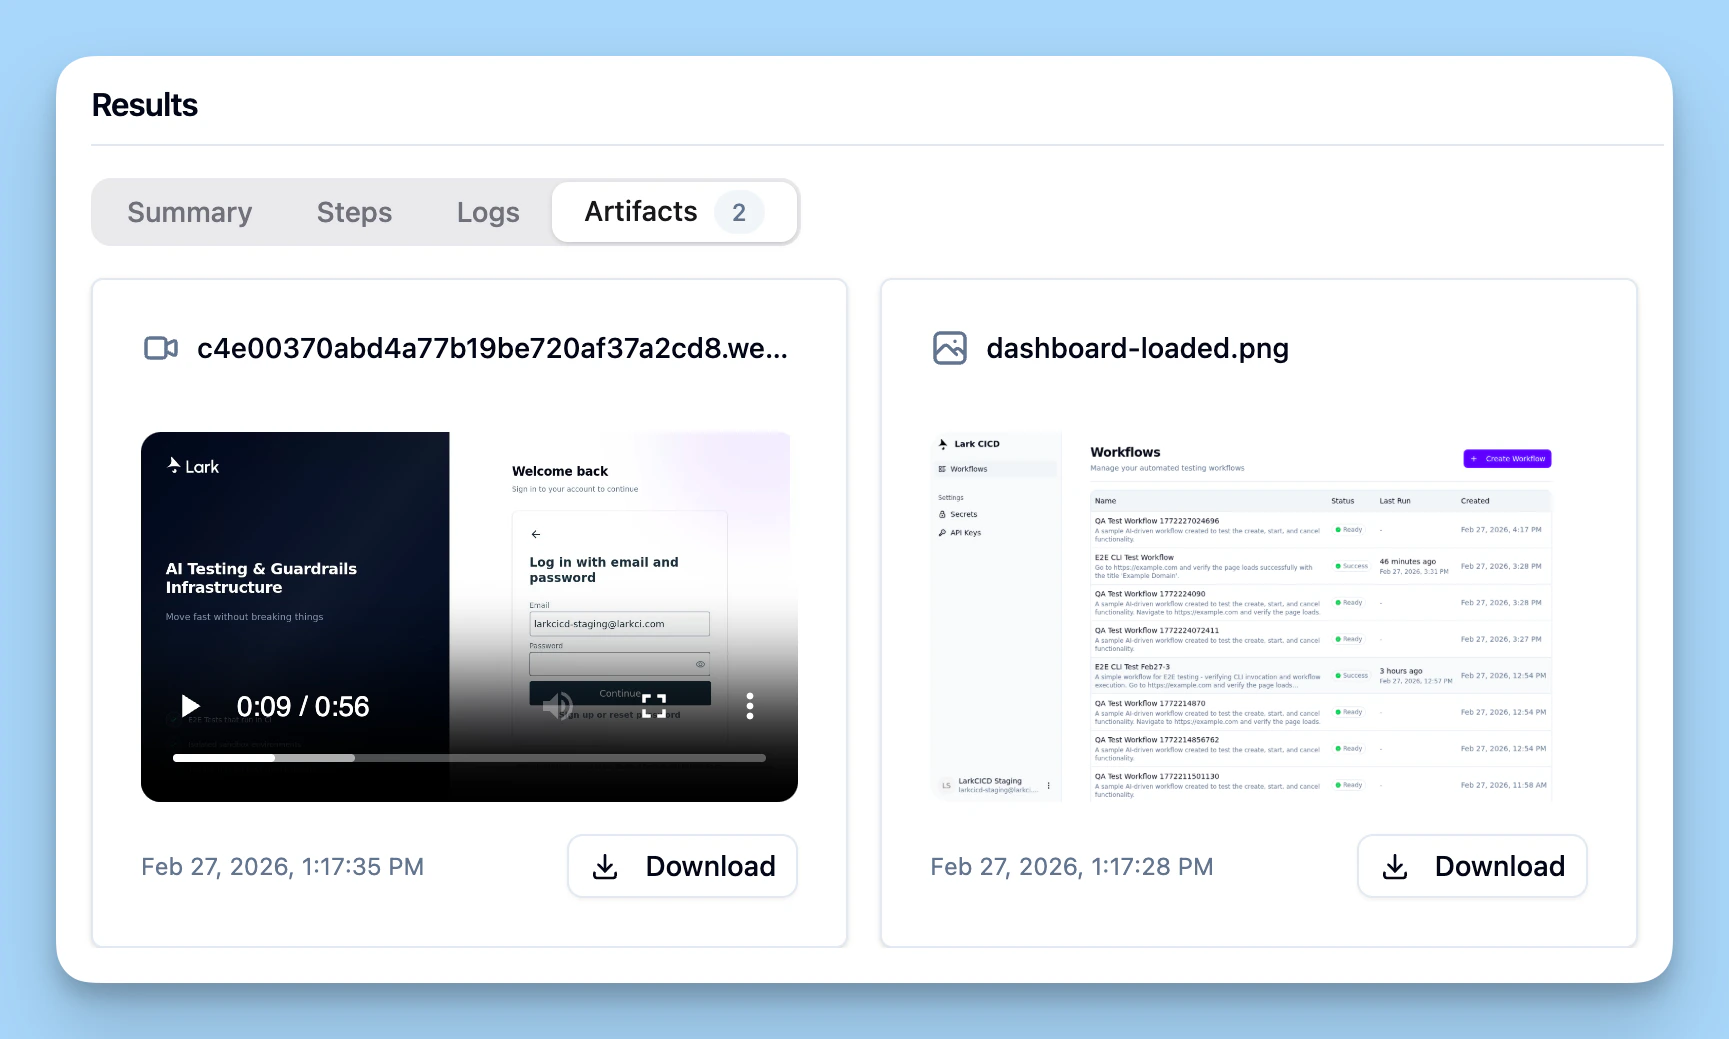
After the run completes, open it in the dashboard to see:
* **Summary** - Pass/fail and high-level outcome
* **Steps** - What the agent did (and, for AI-driven runs, how it chose to do it)
* **Logs** - Detailed agent output
* **Artifacts** - Screenshots, recordings, and other generated files
In the [dashboard](https://dashboard.getlark.ai/workflows), go to **Workflows**. Click **Create workflow** to add a new one.
Write your test in plain English. For example, "Log in and verify the dashboard loads" or "Call the API and check the response." No code required.
* **Deterministic (i.e. scripted)** - The AI writes a script that runs the same steps every time. Lark keeps the test updated as your product changes (e.g. UI updates).
* **AI-driven** - The AI performs the test from scratch each run, deciding how to achieve the goal. Best for complex flows like "follow the integration quickstart and verify it works."
If the test needs credentials (API keys, login credentials, etc.), attach a [secret context](/testing/secrets). Otherwise you can skip this.
Hit **Run**. The workflow runs in a sandbox environment. When it finishes, you'll see the result and any artifacts (screenshots, videos, logs).
Make sure you have Node.js 18+ and your API key set:
```bash theme={null}
export GETLARK_API_KEY=your-api-key
```
```bash theme={null}
npx -y @getlark/cli workflows create \
--name "New User Signup" \
--description "Go to dashboard url and verify that you can sign up as a new user." \
--mode deterministic
```
Pick a name, describe what to test in plain English, and choose a mode:
* **Deterministic** — The AI writes a script that runs the same steps every time. Lark keeps the test updated as your product changes (e.g. UI updates).
* **AI-driven** (default) — The AI performs the test from scratch each run, deciding how to achieve the goal. Best for complex flows.
See the [CLI reference](/testing/cli) for all options.
If the test needs credentials, create a [secret context](/testing/secrets) in the dashboard and attach it with `--secret-contexts`:
```bash theme={null}
npx -y @getlark/cli workflows create \
--name "User Login" \
--description "Go to the dashboard and verify you can login to the dashboard." \
--mode deterministic \
--secret-contexts dashboard_login
```
```bash theme={null}
npx -y @getlark/cli workflows invoke --all --wait
```
The `--wait` flag blocks until the run finishes. When it completes you'll see the result in your terminal.
## View results
After the run completes, open it in the dashboard to see:
* **Summary** - Pass/fail and high-level outcome
* **Steps** - What the agent did (and, for AI-driven runs, how it chose to do it)
* **Logs** - Detailed agent output
* **Artifacts** - Screenshots, recordings, and other generated files
 Next, run the same workflow [from CI](/testing/ci) so it runs on every PR or deploy, or drive workflows directly via [MCP](/mcp-quickstart) from Claude Code, Cursor, and other agents.